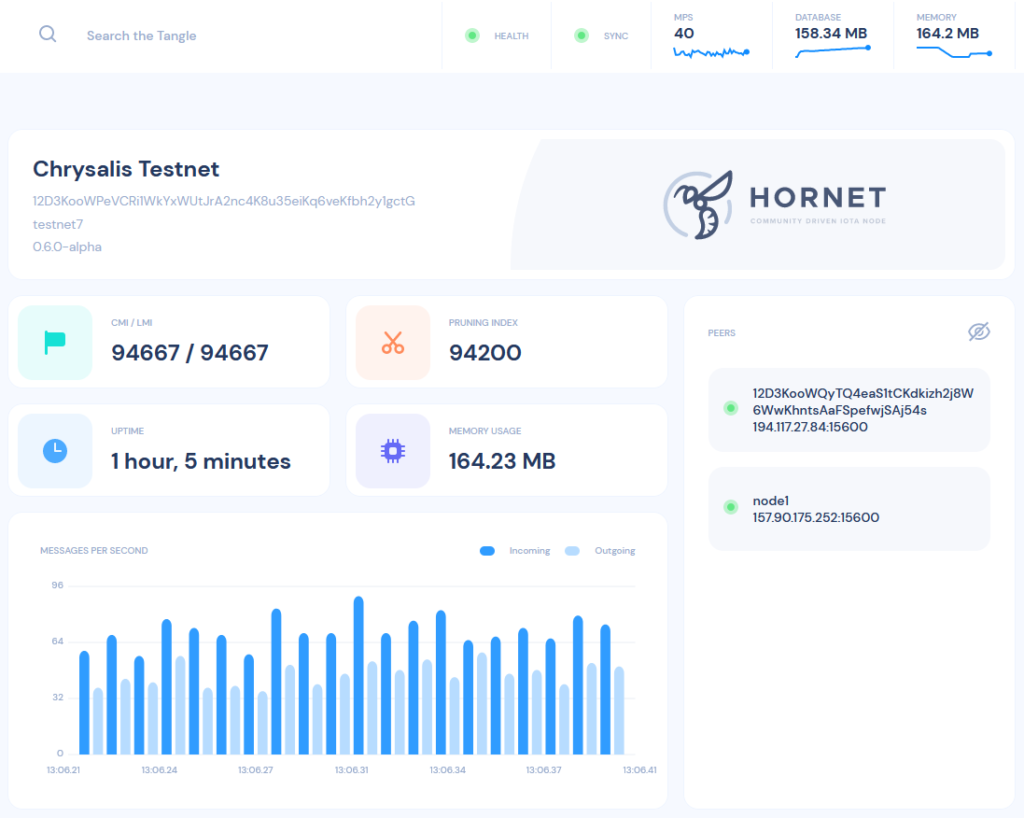
This blog post describes how to build, configure and run an IOTA HORNET node. HORNET is a powerful, community driven IOTA fullnode software written in Go.
The IOTA Foundation (IF) worked over the last year to migrate the legacy IOTA protocol to a production ready network called Chrysalis. Exotic parts of the network got replaced with industry standard components, addresses are now reusable and the confirmation time of transactions are below 10 seconds. All parts of the Eco-System are coming together. The official release date of the new Chrysalis network is April 28th 2021. This will be the biggest upgrade of the IOTA Network in history – A NEW DAWN.
I have worked for a long time with Microsoft technologies and followed this project for a while now. The technical progress that the IF made with the IOTA protocol made me curious to hand on with their technologies. If there ever was a time to look beyond the Microsoft box, I think this is it.
Build and run HORNET from GIT main branch
The HORNET GIT – Repository can be found here:
https://github.com/gohornet/hornet
Clone the repository and checkout the main branch to have the latest stable stage of development. To build the application you need the GO development tools, which can be found here:
Open the command line tool, switch to the HORNET folder and build the application with:
C:\git\hornet>go buildAfter the successful build we can run the HORNET server with Chrysalis main net configuration.
! Important: It looks like in standard configuration HORNET using rocksdb, which currently makes some problems under Windows. We need to swap out rocksdb engine for pebble in the config.json file !
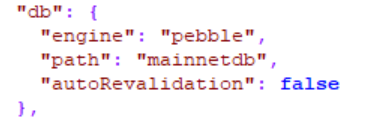
To start with a clean database and snapshot files, we can remove them with “deleteAll” parameter:
C:\git\hornet>go run main.go -c config.json --deleteAllHORNET Server should start up now. The dashboard is available at http://localhost:8081
Configure Admin-Login and peers
The admin login password can be configured in the config.json file, which is in the root folder of HORNET server. Place the password hash and salt in the dashboard section of the json file.

There is a tool integrated in HORNET which you can use to generate the password hash and salt:
go run main.go tool pwdhashFor all the lazy ones, here is a password hash and salt configuration for username ‘admin’ and password ‘admin’:
"dashboard": {
...
    "passwordHash": "4f67881488e0450ac5ea916353778bbb35c760775b79f3d257626be9fecdd91d",
    "passwordSalt": "96ec85080deef9c2a1dcc31b53f621a7c2555f941c84aaa95dfa5a2da1e6714e"
...
}
After a restart of HORNET you should be able to login as admin on the dashboard.
! Important: To configure and communicate with other peers you need to activate the Port-Forwarding in your Router and open Windows Firewall for Ports 14265 and 15600 !
In the Peers section of the dashboard we are now able to configure our peers. On the top right, click on ‘Add Peer’, then fill out the form with the peer address, ID and an alias name.
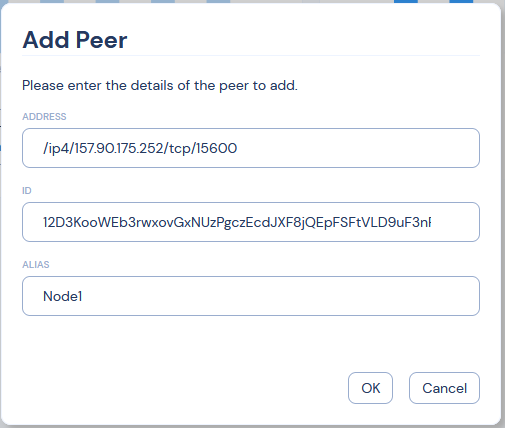
You can find other nodes for peering at Discord https://discord.iota.org in #nodesharing channel. Second source for peers is https://nodesharing.wisewolf.de. Here you fill in your peer details, in return you will get a list of peers that you then use as neighbors. Also it’s very useful to double check if your peer is available for others.

Your node is set up and ready to use now. The official documentation of HORNET can be found at https://hornet.docs.iota.org.
